
What A MAROON...My Salamanca Jacket


Lining, that is!


That really doesn't make much sense, but it's been stuck in my brain the whole time I've been working on my Salamanca Jacket. The pattern is a pretty new release from Itch-To-Stitch. I knew right from the testing call that I would NEED to make this jacket (probably a couple times), so the Sew Along being run via the company's Facebook group the last few weeks was a good excuse to dive right in.

Based on the feed back of the pattern testers, and my experience with Itch-To-Stitch patterns, I decided to skip the fitting muslin and start with a wearable version. From my stash, I selected this faded dirty grey raw silk suiting. It's shot through with pink and rust, is full of slubs and flaws and lacks the sheen so loved in finely finished silk. It's one of those fabrics that sat in my stash because I didn't care for it the second I opened the delivery box. As it turns out, even an unloved fabric can become something great when combined with the right pattern and accents. For a lining, I chose a mid-weight maroon linen from my local Joann's store. I had about 0.75 yards of it left over from an old project, but it wasn't enough. Fortunately, it's a staple fabric and I was able to grab a little more to finish the jacket.


This jacket has 6 button holes. After my last attempt at machine stitched button holes, I decided to just make bound holes this time. I've never actually done them before. I've made faux bound button holes, where I did all the little welts, but never made the windows at the back, so they aren't functional. I went all the way this time. It really wasn't hard, It just took a great deal of time. Like a whole Saturday to do the welts and window prep, then a few more hours at the end of the project to hand stitch the windows to the back of the welts. I think it's worth it. They look really good!

 With button holes out of the way, The construction of the body came together really fast.


I have this thing about long sleeves: I don't really like them unless I'm trying to snuggle up and stay warm. Bracelet length, 3/4 or none at all are my favorite, so I decided to chop off a bunch of the sleeve and make a roll up cuff with my lining fabric. I took 7 inches off the sleeve. Yeah. 7.  The first 2 were just a general shortening of the sleeve using the S&L line on the pattern. The other 5 came off the bottom. I cut both the lining and shell sleeve to the same length, and then created a separate cuff piece. It is the same width as the new sleeve edge by 8 inches. Enough to roll up without a bunch of excess fabric.


I constructed the sleeves just as the pattern instructions directs so as to obtain the same fully enclosed seam finish. I simply connected the ends together with my cuff tube instead of to each other.


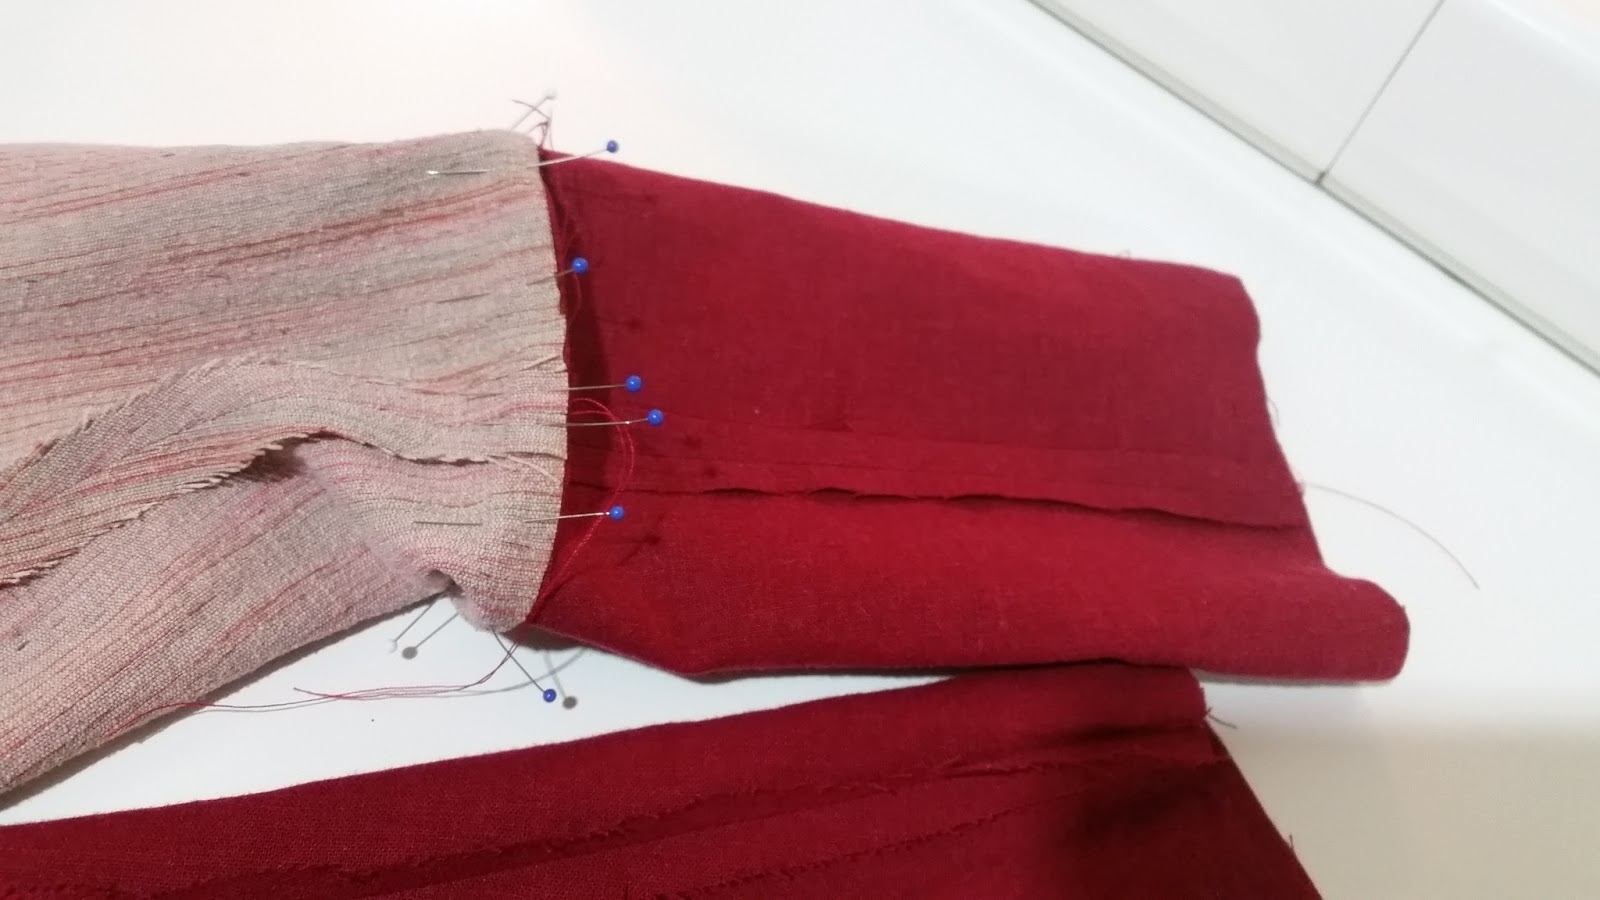
 Once it was all stitched, I pressed the seams back toward the sleeves, turned it all right side out and then stiched in the ditch between the cuff and sleeves to hold everything in it's proper place. The result is exactly what I wanted.


It's not until near the end, when you finally get to put the yoke onto the jacket that you really see how it comes together. It's also the first time in the whole sewing process that you can get the jacket on and assess the fit. 


Overall, for making zero pattern adjustments, the fit straight out of the envelope is pretty fantastic! The jacket hits in a flattering spot in front and back, it's not too voluminous, so while it's a swing style jacket, I still feel slim. It is, however, a tad snug in the sleeves and across the back. I have yet to release my pleat tack, so that will help some, but I feel like I will size up next time. Just the same, it is 100% wearable as-is and the more finished it becomes, the more I love it.


I had intended to have pictures taken when I wore this out with my friend, but it just didn't work out. I think if I continue to hold this post until I get shots of me in my jacket, it might never get posted! So, here's Heidi wearing my jacket.


**As a side note, those cuffs were bugging me and felt wrong. I tucked them up inside the sleeve and was very happy with the cropped sleeve. The width of it didn't feel so small anymore and I wasn't constantly fussing to push them up.

Join the conversation at our Group's Facebook Page, Sew Alongs & Sewing Contests, and share what you are working on this week! 

Did you miss a previous Seasonal Sew Wardrobe Post? Catch up here:

Comments

Popular posts from this blog

My Perfect Vacation Pants, The Itch-To-Stitch Sequoia Cargos

I'm back at it with the pants again! Itch-To-Stitch has a new pattern this week: Sequoia Cargos & Shorts . It's still winter here, so I'm sharing the long pants option today. I'm taking a long weekend trip this March, and I need to start sewing a vacation capsule to pack. For the last 15 years or so, my friend has taken a casino bus trip with a few dozen of her teaching colleages. A few years back, her husband decided he no longer wanted to go, and I've volunteered to be her Plus One for the third year in a row. We will be getting on a bus super early on a Saturday and driving 6 hours or so over the Mackinac Bridge to the U.P. The ride up is filled with chatter and drinking and games, and we all have loads of fun. Then the next two days are filled with more food & drink, card games & slots. I'm not much of a gambler; I'd rather spend my dollars on a Pina Colada than a pull of the slot handle, but I find plenty of ways to enjoy myself. N

Meet My New BFFF: Breaking Ground With Mountain View Pull On Jeans From Itch-To-Stitch

Finding perfect jeans is like finding a unicorn....  Do YOU have unicorn in your back yard?  Yeah. Me either. What I DO have is the newest Itch-To-Stitch Designs pattern release: Mountain View Pull On Jeans , and they are my new BFFF! They MIGHT even be unicorn jeans... Breaking Ground is mostly about trying new-to-you designers,  but you can also twist it to be a new-to-you technique, style or other such personal challenge.  Obviously, Itch-to-Stitch is NOT new to me, but the concept of pull on pants as everyday wear is, and it's a trend I've tried to avoid for a long time! Pull on pants are for yoga and sleeping, right? My personal rule is no lounge pants outside the house, unless I'm ACTUALLY going somewhere to exercise. (SNORT)  Wearing pull on pants or leggings as real pants (that look terrific) is how I'm Breaking Ground for myself! Pattern Details Mountain View Pull On Jeans gives you just about everything you find in a traditiona

When A Pattern Test Goes Pear Shaped: Saving My ITS Danube Jean Skirt

Every now and then, I have a project where every decision I make is wrong, and I have to battle tooth & nail to get to the end. Itch-To-Stitch recently released the Danube Jean Skirt . I love everything about the design of this skirt: slim fitting, DENIM, wind friendly, go-with-everything casual, sits at the natural waist, side slits for something fun and less formal. I was very excited to jump into the testing phase. I had a couple heavier non stretch twill fabrics in my stash suitable for muslins... and exactly 1 piece of non stretch denim which I earmarked for my final skirt. In The Beginning The first muslin revealed the need for some fine tuning, something that should be expected during the testing phase. V2 for the pattern was distributed and my second muslin came together quickly. I got exactly what I expected. A pretty well-fitting skirt except for my prominent full seat which was pulling all my fabric out of whack. No big deal, right? I've had this issue for