I'm back for the 2017 Sew Long Summer Blog Tour, Hosted by Mahlica Designs! Cross your fingers that I don't accidentally delete this post right before publishing like last year... I didn't leave myself any rewrite room this time.

It's no secret that fall is my favorite season.
Boots, tights, wool and cool weather, what's not to love?
The Pattern
A shift dress is an iconic thing that never really goes out of style. I've wanted to add this classic shape to my closet for a long time, but I've always feared that the loosely fitting waist wouldn't flatter me.

In August, Oxana Sinclair of Sinclair Patterns invited me to test her newest creation: Reese Shift Dress and I just couldn't resist. When I received the printable files, I was absolutely delighted to discover the dress was being offered in both a standard draft AND a petite draft for the entire size range!
Design Features
-Jewel Neckline
-Sleeveless
-Invisible zipper closure
-Darted back and subtle waist shaping
-Side splits at the hem
-Fully faced clean finish for both armholes and neckline
-Unlined for a quick sew

Fitting Work
When a dress has such a minimalist look, getting the fit right is so important. I started this project the way I do all the others, with a muslin in my selected size. I measured at the bust between a US 8 & 10, between a US 12 & 14 at the waist and a US8 for the hips. I knew I wanted a smaller amount of ease at the waist, and opted to try a straight 8 with the petite drafting.


As you can see, this worked out really well for me! I like my garments to fit on the slim side, and feel I would have been swimming in a larger waist size. this does make the bust a little bit tight. Other than my normal 1/2 forward shoulder adjustment, and taking an additional 2 inches off the hem, here are some of my other personal fit changes:
Version 1:
- Lowered the darts. Even in my perky bra I didn't come close to reaching them. (The dart placement was adjusted on the final version to account for this, but I still recommend making a muslin to check your personal fit.)
- Removed 1.5 inches of extra length out of my upper back. I seem to find myself needing to shorten the backs of things a lot lately. I need to get better at finding the best way to do that.
- I took 3/4 inches out, horizontally, from my upper chest to reduce the extra fabric I had there.
(Changes 2 & 3 reduced the size of the armhole, which I like very much. I have a smaller than average shoulder joint.)
This is where I ended up for version 1:


Version 2:
I knew I had bust drag lines in the muslin stage, but I really wanted to avoid having to do an FBA. For my second version, I selected a really special fabric, so I decided to tweak a couple more things, including that FBA.

- I did a 1/4 inch FBA, which gave me an extra 1/2 inch of space in the bust, and totally eliminated those drag lines!
- The pattern itself is a little wider than I measure, both in the upper chest and upper back, so the armhole edges rub a little. I scooped out the armholes a bit to reduce that.

Some Special Fabric
In September 2016, I picked up a couple yards of AMAZING wool fabric at the American Sewing Expo from the Beautiful Textiles booth. I snagged this 2+ yard piece for $30 from their Last Chance shelf. it was a steal!
Given the unbalanced vertical stripe pattern, combined with the horizontal color gradation, I needed a pattern that didn't have many seam lines. Reese Shift Dress was PERFECT!

I'm not going to lie. I AGONIZED for too long over where to place the horizontal colors on my body. then, I meticulously cut my pieces to print match at all the seams.

Making a Simple Dress Complicated
This wool is beautiful...but lets face it, no matter how smoothly it's woven, wool can also be on the scratchy side. I decided if I were going to use my special fabric, I was going to jump all in and draft a lining for it. After all, how hard could it be?
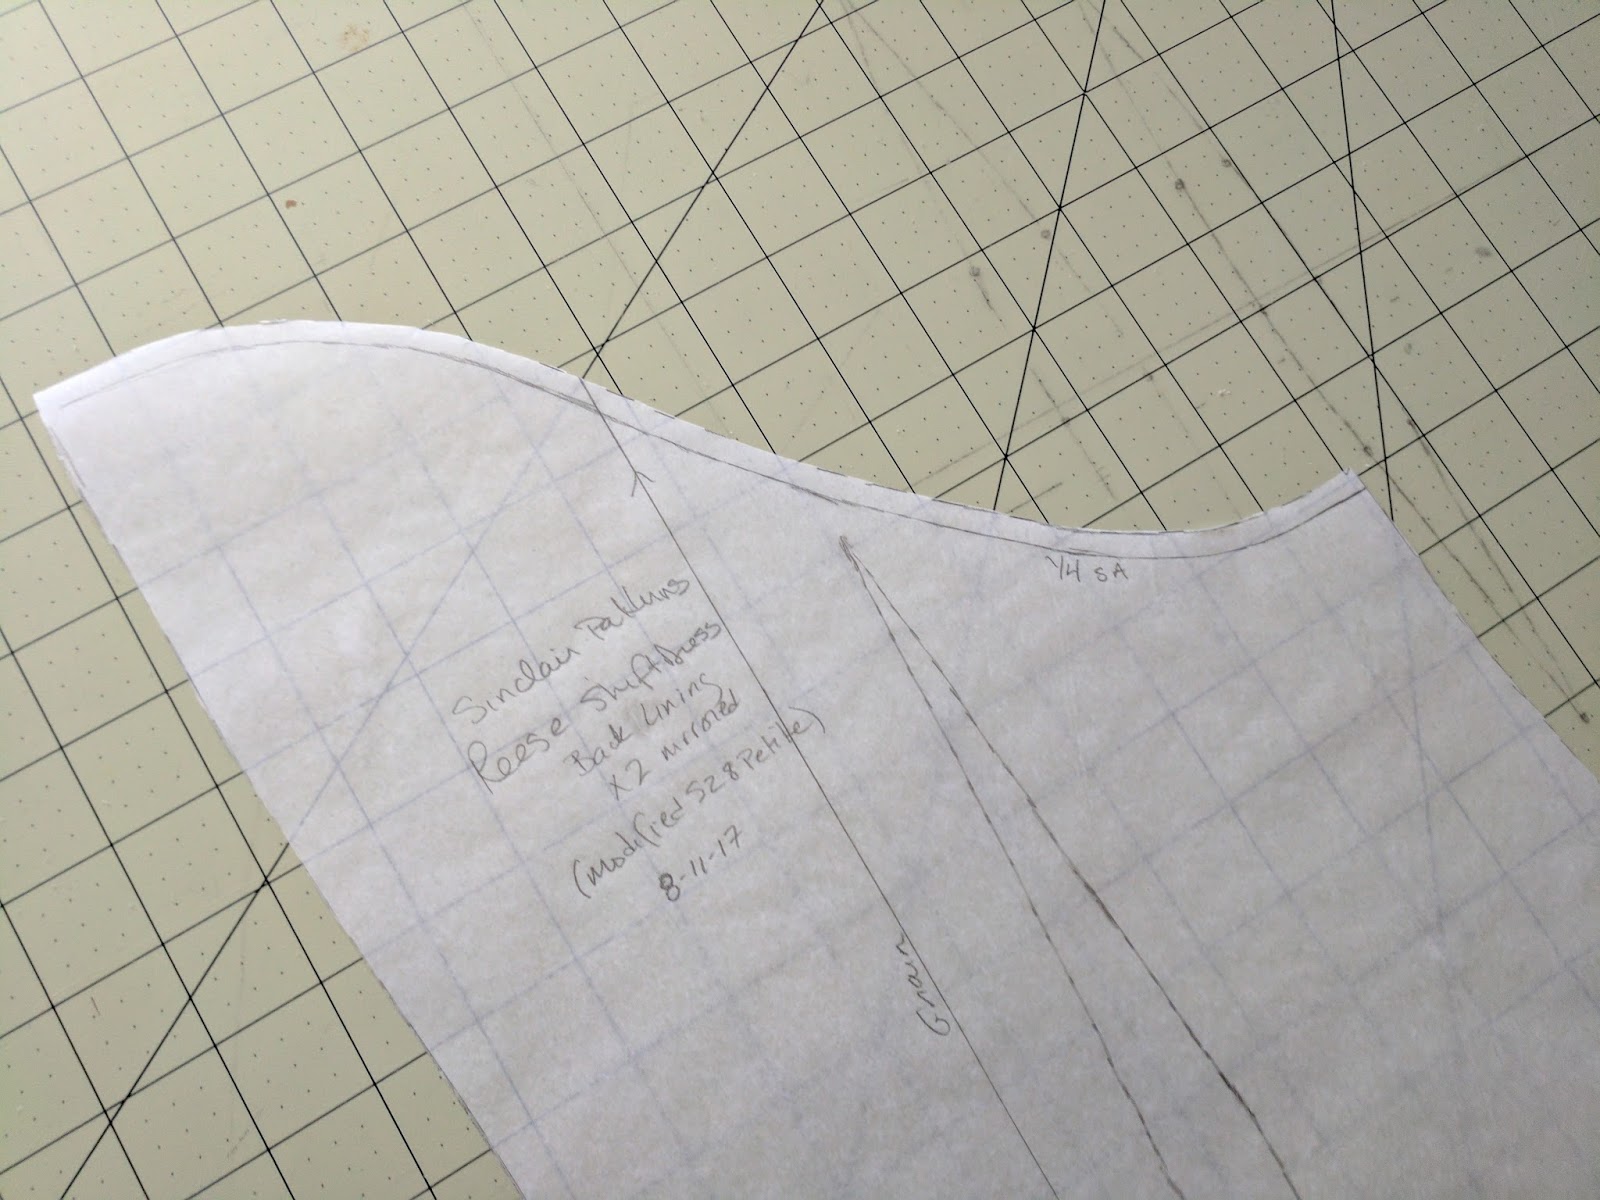
Turns out, not that hard! I simply traced the front and back pattern pieces, removed the facing portion and added seam allowances to the new lining pattern and the facings.

My lining came out perfectly! And I used my favorite tutorial on machine stitching a lining to an invisible zipper HERE to get this super sleek finish.


After that was finished, it was back to the main instructions to turn everything out and press it into place.
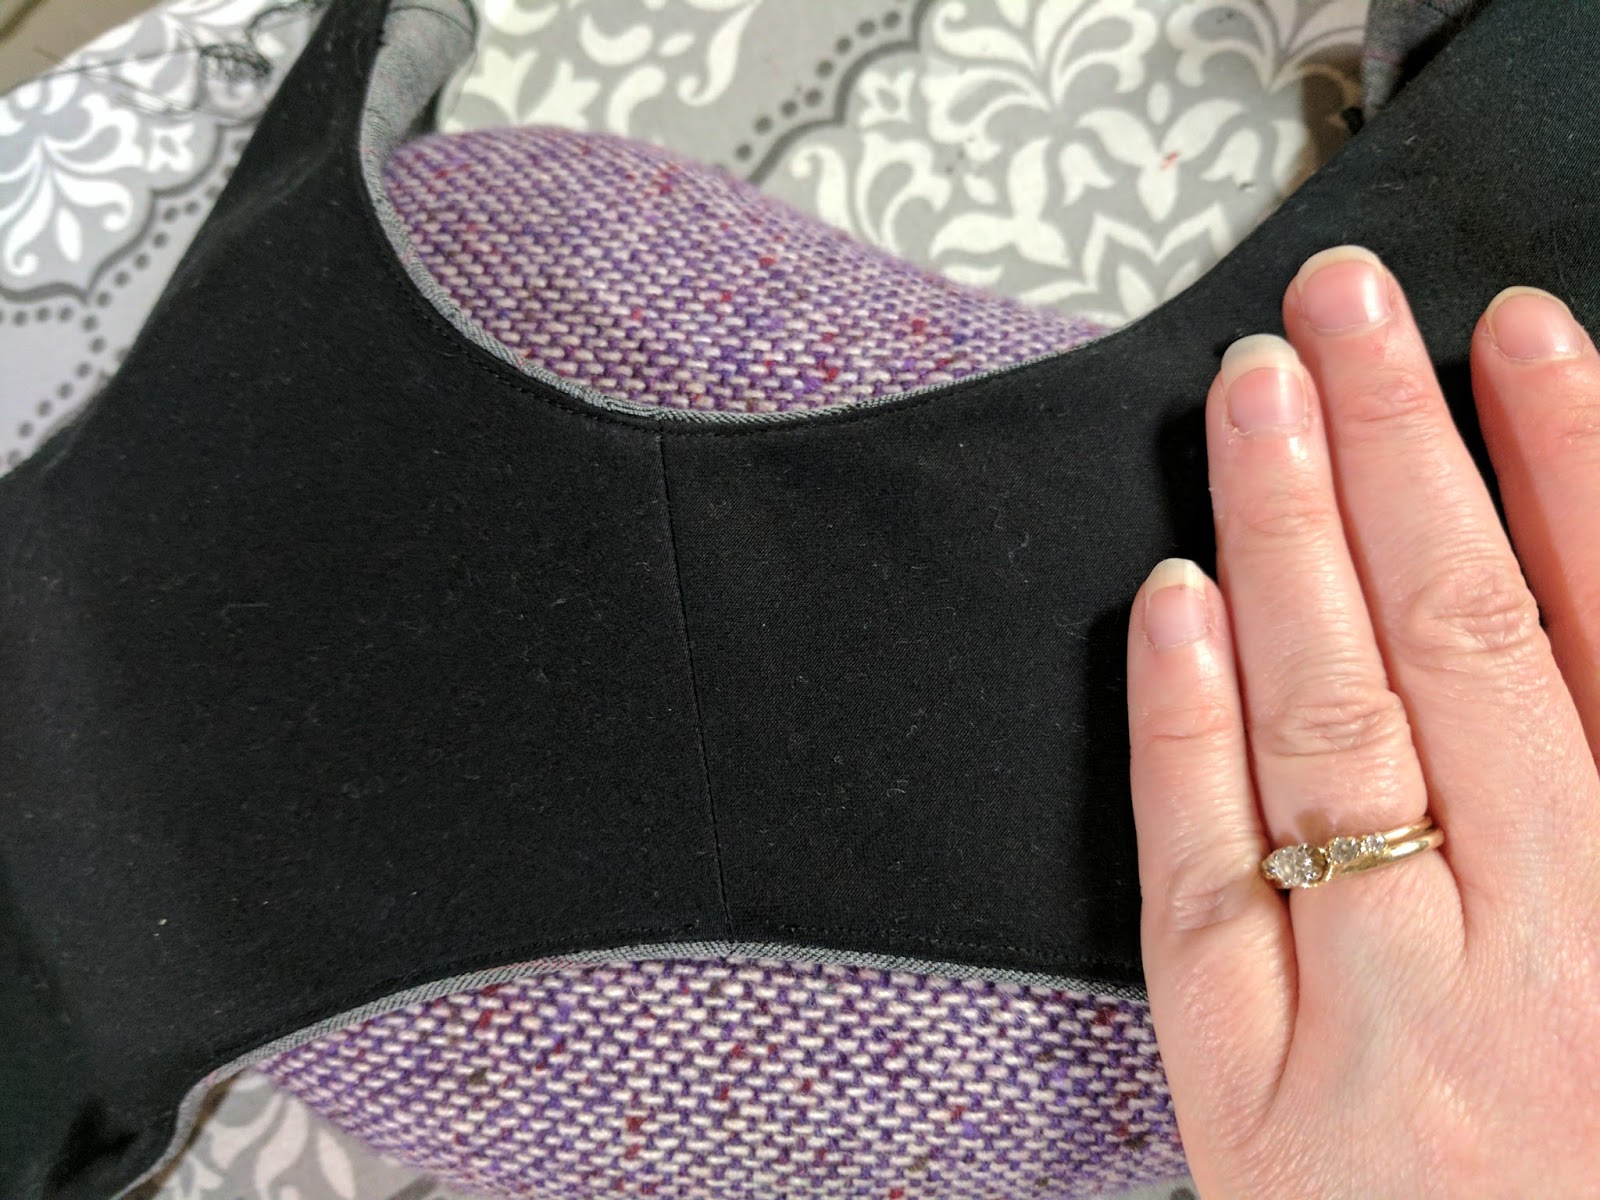
The facings are drafted just slightly smaller than the dress, which is a lovely detail, allowing them to turn and roll beautifully.
Final Photos
So how did my lined wool shirt dress turn out? You decide:


Is Reese Shift Dress For You?
I am so pleased to finally have a pattern for this iconic garment in my arsenal. I've always wanted a shift dress that was flattering and well fitted, but came up frustrated with other attempts. this combination of a semi fitted back and skimming ease front is perfect for my short, busty frame.

I feel like this pattern is a versatile template for special prints, and creative hacks like adding front welt pockets, color blocking or "belt tabs" that come from the side seam and button above the front of the hip to highlight the waist.
The Reese Shift Dress would make a great dress for the 1960's album if you are participating in the Create the Decade Sew Along over at the Sew Alongs & Sewing Contests FB Group.
If you want to grab a copy of Reese Shift Dress, you can visit Sinclair Patterns HERE.
(Black velvet cardigan is an unblogged Paro Cardigan from Itch-To-Stitch Designs. You can read about that pattern HERE.)
More Sew Long Summer Reading...
Please Stop by and visit all the other participants to see how many different ways we say "Sew Long Summer!"
Wow, wow, WOW! This looks amazing on you! The work you did as a tester and the steps you took to perfect the fit really paid off. Fall is my favorite season to dress for, too. Tights and boots all day every day!
ReplyDeleteThank you, Victoria! Getting the fit on this correct was so satisfying! Now if it would stop reaching almost 80 by mid day, I could get my boots and tights on for the season for real!
DeleteThey look great on you! I can see the evolution of your fit. The fit on the wool dress is awesome, and I love how you placed the strips! Well done. :-)
ReplyDeleteThanks, Kennis! I think I picked the right placement for the stripes too.
DeleteYour wool dress looks awesome on you! Beautiful work as usual!
ReplyDeleteThank you! I was nervous to cut into my fabric, but it all worked out.
DeleteOh my goodness! All the work you put into this dress is so worth it. Sometimes I chuckle at what seems like over the top effort that you make, but the results you get are so darn good!
ReplyDeleteHAHA! Yes, I do often go over board. Sometimes, like this time, it's worth it... sometimes I just learn something.
DeleteI love the effort you put into fit and it really pays off. This dress is an absolute stunner! Epic pattern matching too!
ReplyDeleteThank you so much, Sue!! You know, the print matching wasn't too tough on this one. I mostly worried about the large horizontal color changes.
DeleteOh my goodness!! Great job! I love how it turned out, and you soooooo got out of it what you put into it.
ReplyDeleteThat is so true, Ronda! You really do get from a project what you put into it.
DeleteI love the wool version - those vertical lines look amazing, definitely worth te extra time you took to make it.
ReplyDeleteThank you so much, Tenille! I'm so glad I got past wanting to be lazy and just did the FBA. It smoothed everything out.
DeleteThis dress looks amazing on you! Your custom fit is perfect and I love the fabric!
ReplyDeleteThanks! In this case, matching the right pattern to the fabric really made all the difference. I'm still learning how to do that consistently, LOL!
Delete