During the last Itch-To-Stitch sale, I grabbed myself a copy of Emily Culottes. I don't know what drew me to the pattern. I mean, I've always dismissed the trend as Not For Me. All I know is I was standing in Joann's, buying a length of lovely Nicole Miller floral twill and thinking, "This needs to be culottes." The pattern has several different options. I decided I wanted the pleated front for extra swishy skirtishness as well as the welt pockets.
Choosing welt pockets means you jump in immediately to some slow and precise stitching. I may or may not have accidentally fused my interfacing over a marking pin. Oops. No worries, I removed it without difficulty.
I am no stranger to welt pockets, having made several over the years, but for some reason I just could not envision how these would come out. I think the reason is two-fold: 1. I've always used a two piece pocket bag. This pattern has a 1 piece bag that folds back on itself once it's all tucked in through the slit. 2. I felt like stitching from the pocket bag side was upside down. I've always drawn my box on the interfaced side and followed the lines.
I really needn't have worried. Kennis gives excellent instructions...even if you are just following them blindly as I did. Also, Sew Meris hosted a series of sew along blog posts that highlight the different Emily Culottes. You can access the initial post HERE, or right from the pattern shop page.
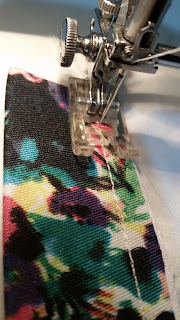
In no time at all I had my stitching done and sliced into the front of my culottes. A little bit of pressing really is magic. If there are any flaws, the print hides them well.
Once the welts were in and the pocket bags sealed up, it was very quick to get the zipper installation. But first, I couldn't resist a quick try on. It's a good thing I did too...I'm overwhelmed by all those flowers! I probably should have cut a size smaller, but how was I to know I'd shrink in the 2 weeks the printed pattern sat on my desk untouched?
I swear I chopped about 3.5 inches off the pattern before even cutting my fabric. Clearly, the hem needs to come up even more. The question is...just how much. I mean, technically, they are shorts, right? And I will be wearing them with flats or flat sandals.
I put this question out to the fabulous sewers in the Sew Alongs & Sewing Contests Facebook group and one of the very lovely ladies responded that there is actually a mathematical way to determine the correct hem length of a skirt or dress proportionate to your height and shoes worn. I got very excited and dove straight down the Google Rabbit Hole to figure out what that ratio was and how I could apply it to me. During my reading, I also discovered a second way that measures your upper and lower leg bones, spitting the difference of them in inches above your knee for the proper hem.
So what on earth am I talking about? Google "how to find your ideal hem length" and you'll get some helpful results. I linked each version to 1 example in case you are a lazy Googler. And now I will highlight both ideas with my personal math:
Version 1. Measure your thigh bone from your hip to the center of your knee cap. Mine is 17ish. (really hard to see when you measure yourself). Then measure your shin bone from the center of your knee cap to your ankle bone. Mine is 15. Take the difference, halved, and that's the number of inches above the knee where my hem should fall. For me, that's about 1 inch above my knee cap.
Version 2. Put on the shoes you plan to wear with the garment. Mine were flats. Measure yourself from shoulder to floor in centimeters. My measurement was 130 cm. (I keep telling you guys I'm short). Divide that number by the Golden Ratio, 1.618. My result is approximately 80 cm. Now measure from your shoulder again down and see where your result falls. Know where 80 cm down from my shoulder hits on me? 1 inch above my kneecap! Same as Version 1.
I was absolutely tickled to get the same result with both techniques. I realize this is because I was flat footed in both, but isn't that how you prove theories? Maybe. I'm not a scientist or a mathematician so don't take my word for it. I like the second version because it gives you the option of moving your "ideal" hem with the shoe you wear. Of course, it does mean that your cocktail dress will need to be longer if you wear those 5 inch heels....


Those look wonderful on you - I even understood the math in determining my ideal hem length! Thanks for sharing!
ReplyDeleteThank you! I was pleasantly surprised at how much I like to wear these. And finding my hem length with math was really fun.
DeleteI think these look great on you, I was intimidated with the welt pockets but you have reassured me, thanks your info super helpful. If your making a second pair then it must be a win.
ReplyDeleteThank you, I think so. And perhaps a third pair with no pleat if I can squeeze it out of the scrap I'm eyeballing in my stash.
DeleteThanks for writinng this
ReplyDelete